The last post was mainly about rearranging the code, wrapping up models and rigid bodies into the Behaviour classes they belonged in.
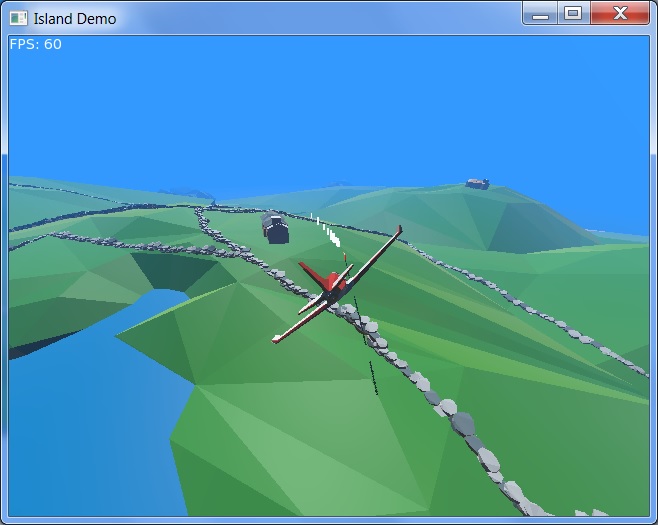
This post is a little more fun, adding bullets and simple ground markers that delete themselves after a second.
The bullets are remarkably hard to capture in a screenshot, for reasons too boring to go into, but they look way better in-game!

WebGL Demo
I’ve also added a WebGL demo here so you can try online:
Island WebGL Demo
As before, use Cursors to move, A & Z to speed up/slow down, plus Space to fire. Additionally, the plane now has yaw control, which is controlled via Q and E.
Plane changes
There have been a few changes to the plane’s physics, most obviously in the addition of yaw controls, but also in that the plane will now pitch and yaw when banking. This means that banking causes the plane to turn as a real plane does (the pitch pulls the banked plane around) and also starts losing height, via yaw.
It’s far from a proper simulation, but still feels believable enough for the most part, at least in terms of a simple arcade-style game.
Interestingly, adding the pitch and yaw during banking made it much easier to target and hit the buildings, as it behaves much more like a real plane now, so movement is more predictable. (It’s still pretty difficult, mind!)
It’s hard to believe the underlying physics representation is still just a simple sphere!
Source code — what you’ll need
As usual, the intention of these posts is that you scroll through the code at the same time, in order to see what each section is doing.
Download the code and media below before continuing. Open up island.monkey2 in the default Monkey2 editor, Ted2Go, and additionally, bullet.monkey2 and marker.monkey2. (The easiest way is to simply drag and drop all three files into the Ted2Go window.)
IslandDemo source and media [Note that this is NOT a secure server, but the zip file contains only source code — text — and the 3D media. Run it through your virus scanner for peace of mind!]
Double-click the island.monkey2 tab to make it the default build file and hit F5, or the Run icon, to try it out.
Switch to the bullet.monkey2 tab, where you’ll find the following extract:
Const BULLET_LENGTH:Float	= 15.0
Const REMOVE_DISTANCE:Float	= 750.0

Class BulletBehaviour Extends Behaviour

	Global BulletModel:Model
	Global LastBullet:Entity

	Field start_pos:Vec3f

	Function CreateBullet (parent:Entity)

		If Not LastBullet

			BulletModel			= Model.CreateCylinder (0.33, BULLET_LENGTH, Axis.Z, 8, New PbrMaterial (Color.White))
			BulletModel.Visible	= False

			New BulletBehaviour (BulletModel.Copy (parent))

		Else
			If LastBullet.Position.Distance (parent.Position) > BULLET_LENGTH * 2.5
				New BulletBehaviour (BulletModel.Copy (parent))
			Endif
		Endif

	End

	...
We have two constants, BULLET_LENGTH and REMOVE_DISTANCE, with some default values defined.
The ‘bullets’ in this example are really just stretched cylinders, intended to look similar to tracer streams, and their collision bodies are the same for simplicity.
BULLET_LENGTH sets the ‘length’ of each bullet;REMOVE_DISTANCE allows us to remove bullets from the scene after travelling a given distance.
This means our bullets are in fact 15m (50ft) long — a fine example of the fraudulent hand-waving peculiar to creating games!
The bullets will travel for 750m before being removed from the scene, so as to limit the number of active physics bodies and related 3D entities.
The start_pos field holds the bullet’s starting position in a Vec3f, which is a 3D ‘vector’ of floating-point type — a structure that holds the x, y, z elements of a three-dimensional position in a single value. (The f in Vec3f refers to float).
Don’t be afraid of Vec3f if this is new to you! We will be assigning start_pos with the bullet model’s position later on, and it’s as simple as:
start_pos = Entity.Position
We can therefore easily store the entity’s 3D position in a single variable.
The behaviour class definition follows, including two class global variables holding Model references:
BulletModel: a base model we can just copy for every bullet;LastBullet: a reference to the last bullet fired. This allows us to avoid firing new bullets until the last bullet has travelled a given distance, a simple way of controlling the fire rate.
LastBullet was originally of Model type, but I changed this to Entity just to avoid casting from Entity later on, in the OnStart method. It’s not important, just shows different options; you can decide for yourself how you prefer to handle this in your own projects — just be more consistent than I have here!
I’ve chosen in this case to create a globally-accessible CreateBullet function from which we’ll create new bullets in the main source file. In island.monkey2, you’ll find this function called within OnRender. It passes in the PlaneBehaviour’s Entity reference, for reasons we’ll see shortly:
If Keyboard.KeyDown (Key.Space) Then BulletBehaviour.CreateBullet (plane.Entity)
The main reasons for doing it this way, rather than calling New BulletBehaviour directly, are:
- It shows that we can wrap the bullet model into the BulletBehaviour class, as an alternative to the way the plane model was set up, where we loaded the model in the main OnCreateWindow function and passed that in to
New PlaneBehaviour;
- but more importantly, it allows us to check the distance between the last bullet fired and the ‘new’ bullet, prior to creating it, and to keep all of this checking bundled within the BulletBehaviour class. (We don’t want to create a new bullet if the last bullet hasn’t travelled far enough.) This avoids the need for checking to be implemented from the call site — the location from which a function is called — and also does away with the need to hold a reference to the last bullet fired inside the main code.
Instead, CreateBullet will only call New BulletBehaviour after performing these basic checks.
CreateBullet receives a parent entity, which will be the plane model, then checks if this is the first call to CreateBullet, in which case LastBullet will not yet exist; if LastBullet doesn’t exist, it creates the base model, BulletModel, and spawns the first bullet.
The New BulletBehaviour call sets up LastBullet, so that on the next call (and all subsequent calls), the Else block will be called instead, carrying out a distance check prior to creating a new bullet.
(In fact, it would probably more sensible to rearrange things so that the less-common case falls within the Else block, ie. creation of the bullet! However, it’s not speed-critical, so I’ll just leave as-is — I think it’s a little clearer as to what is happening this way.)
Once created, the base BulletModel will be copied and modified for each new bullet fired.
BulletModel is a simple cylinder model, with 0.3m (1ft) radius to enhance visibility (more cheating!), and the 15m length defined earlier, aligned along the z-axis (so orients ‘into’ the screen, rather than vertically or across). It has 8 segments to keep it simple and a basic white material.
As this is just a base model to be copied for each actual bullet, it’s hidden from display so as not to leave it floating in the scene.
In the usual case, where BulletModel and LastBullet have already been created, we check the last bullet’s position relative to the plane:
	If LastBullet.Position.Distance (parent.Position) > BULLET_LENGTH * 2.5
		New BulletBehaviour (BulletModel.Copy (parent))
	Endif
Notice again that we have a handy reference to each entity’s Position property; Position is a Vec3f, which in turn has a handy Distance method available.
To see this, click on the word Position and press F1 twice: this will open up the Position property documentation. Click on std.geom.Vec3f, then on Vec3 (the base 3D vector class). This will list all of the data and methods available to Vec3f. You’ll find Distance listed further down.
Here, we are using LastBullet’s Position Vec3f to call the Distance method, and we simply pass in the plane’s Position for comparison, receiving a single distance value as a result.
From trial-and-error, I’ve chosen to spawn a new bullet only if the last bullet is over 2.5 times the bullet length away from the plane. If not, nothing happens and the function is done — no bullet is created.
This initialisation could be simplified greatly by having a specific externally-called function that sets up BulletModel (which would have to be manually called in the main code file prior to using New BulletBehaviour), but I preferred having everything all wrapped up here — and a single test for LastBullet’s existence really isn’t going to be having any practical effect on processing speed.
To clarify the New BulletBehaviour call here:
New BulletBehaviour (BulletModel.Copy (parent))
Here we pass in a copy of the base BulletModel — the Model class has a handy Copy function to create a standalone copy of a model.
Note that Entity.Copy cannot copy entities with attached components, such as physics bodies, hence BulletModel is nothing more than a basic model with no rigid body or collider.
The parent reference was passed in as CreateBullet’s only parameter, set as the plane model when calling from the main source file.
One really handy aspect of creating an entity with a specified ‘parent’ entity is that it picks up the parent’s position and orientation upon creation — so our bullet is already aligned correctly with the plane.
You could instead pass in the plane’s position and orientation, and use these to align the bullet, but I find the parent solution much more convenient.
The only downside to this method is that you need to remember to remove the parent relationship once in position, so as not to affect the bullet’s position or rotation when you modify the plane. We’ll be doing this inside BulletBehaviour’s OnStart method.
Using OnStart
I’ve updated both the plane and bullet classes to move the physics body setup into the OnStart method, instead of doing this during New.
The reason for this was that bullets were causing the program to crash when spawned: it turns out OnStart can be called before New has completed!
Although the rigid body was set up during New, OnStart had already been called by Scene.Update before this happened.
As OnStart makes reference to the body, which didn’t yet exist, the program would crash. Carrying out the physics setup in OnStart avoids this, since we’re making sure the body exists before we reference it.
I don’t fully understand why this works the way it does, but just bear in mind that Scene.Update may call OnStart before New has completed! Just follow this arrangement in your Behaviours to avoid the same fate: leave the New method as a simple Super.New and AddInstance.
Here’s the beginning of OnStart:
	Method OnStart () Override

		Entity.Visible					= True
		Entity.Move (0, -2, 15)

		Local bullet_velocity:Vec3f		= Entity.Parent.RigidBody.LinearVelocity + (Entity.Basis * New Vec3f (0, 0, 300))

		Entity.Parent					= Null

		Local collider:CylinderCollider	= Entity.AddComponent <CylinderCollider> ()

			collider.Radius				= 1.0
			collider.Axis				= Axis.Z

		...
Entity here is a copy of BulletModel, which was hidden upon creation, so we first make it visible.
The bullet will be sitting at the plane’s position by default, with the same orientation, because the plane model was specified as its parent upon creation in CreateBullet. Any movement will currently be relative to the plane’s position and orientation, so we just move it down 2 metres and ahead 15 meters, as judged by simple trial and error.
Next, we are storing the linear velocity of the parent entity’s rigid body (the plane’s body), so that the bullet carries the same speed, to which we are adding a further forward vector, which is modified by the bullet’s Basis (orientation):
	Local bullet_velocity:Vec3f		= Entity.Parent.RigidBody.LinearVelocity + (Entity.Basis * New Vec3f (0, 0, 300))

'
After setting an independent entity’s position and orientation via a parent, remove the parent!
We then, importantly, remove the parent/child relationship between bullet and plane, by setting the entity’s parent to Null.
Note that we stored the parent entity’s speed before removing this relationship — Entity.Parent is no longer available.
We’ll apply bullet_velocity via ApplyImpulse shortly…
Next comes the collider and rigid body setup, as usual, but in this case we have an additional feature:
		Local collider:CylinderCollider	= Entity.AddComponent <CylinderCollider> ()

			collider.Radius				= 1.0
			collider.Axis				= Axis.Z

		Local body:RigidBody			= Entity.AddComponent <RigidBody> ()

			body.Collided				=	Lambda (other_body:RigidBody)

												MarkerBehaviour.Create (Entity)

												Entity.Destroy ()

											End

			...
Notice that body.Collided weirdness!
Rigid Body Collisions
This is how the Bullet Physics SDK gives us collision responses — by way of a callback function.
In this case, the function is a ‘lambda’ function, which is defined ‘inline’ without a name, rather than separately (as with standard functions), and, importantly, lambda functions are able to access variables within the current scope: that’s why we can access ‘Entity’ here, inside the function.
Don’t worry about the details, just define it like so and fill in what you want to happen when this body collides with another:
Lambda (other_body:RigidBody)

	' Response actions go here!

End
This code when be called upon collision, every time the body is touching another. Note that the other_body parameter is filled in by the physics system, allowing you to retrieve that body’s information.
The function will be called continuously while in contact, eg. while a ball is rolling along the ground, not just at the point of collision.
In our case, we create the ground marker (which I’ll cover in a separate post) and destroy the bullet:
	MarkerBehaviour.Create (Entity)

	Entity.Destroy ()
When the bullet entity is destroyed — removed from the 3D scene — so are all of its components, which in this case means automatic destruction of both collider and rigid body. We don’t need to do anything more than destroy the entity.
The other_body parameter gives us a reference to the other body involved in the collision. For multiple colliding bodies, this function will be called against each one in turn. By default, we collide with all other rigid bodies, and their responses are handled automatically.
(I’ll probably go into collisions more in a later post, including the grouping of different types of bodies, and filtering these for different responses in the Collided lambda function.)
You can, by the way, add further collision callback functions if you want. Try uncommenting these lines in the code:
'			body.Collided				+=	Lambda (other_body:RigidBody)
'												Print "Hi"
'											End
For each collision, this extra function will additionally print “Hi” to the console. Note the += syntax here, which adds to the ‘list’ of functions to be called.
Nearing the end, we set the start position (as noted earlier), set LastBullet to the bullet we’ve just created, and set the entity’s colour randomly to one of four built-in colours:
		start_pos						= Entity.Position

		LastBullet						= Entity

		Select Int (Rnd (4))

			Case 0
				Entity.Color			= Color.White
			Case 1
				Entity.Color			= Color.Yellow
			Case 2
				Entity.Color			= Color.Orange
			Case 3
				Entity.Color			= Color.Red

		End
Finally, there’s a tricky little bit of casting required in order to set the ’emissive factor’ in the bullet’s material, which here gives the bullets a sort of glowing effect:
		Local model:Model				= Cast <Model> (Entity)
		Local pbrm:PbrMaterial			= Cast <PbrMaterial> (model.Material)

			pbrm.EmissiveFactor			= Entity.Color

		Entity.RigidBody.ApplyImpulse (bullet_velocity)
I broke this down into a couple of steps for easier reading:
-
Cast the behaviour’s Entity reference to a Model: basic entities don’t have PbrMaterials, which provide more advanced rendering functionality than the plain Material an entity has. Models can use PbrMaterials, and we need this type of material to use EmissiveFactor;
-
The material needs to be cast to a PbrMaterial in order to access EmissiveFactor, and for simplicity we are assigning a PbrMaterial handle here;
-
Now we can set the EmissiveFactor: this takes a Color, and we’re just using the entity’s existing colour (which we just set), causing the material to ‘glow’ in this colour, preventing shadows from appearing as they naturally would, and thereby giving a nice glowing effect.
OnUpdate
Lastly, we have OnUpdate, applied on each physics update (60 frames per second by default, independent of the actual FPS):
	Method OnUpdate (elapsed:Float) Override

		Entity.RigidBody.ApplyForce (New Vec3f (0.0, -40.0, 0.0))

		If Entity.Position.Distance (start_pos) > REMOVE_DISTANCE
			Entity.Destroy ()
		Endif

	End
The first line is a cheat! The bullets weren’t falling as much as I wanted them to, so I manually applied a force to push them down more than gravity is doing by default.
We then simply test how far the bullet has travelled from its start position; if it’s travelled more than REMOVE_DISTANCE (750 metres, set at the top of the file), the bullet is destroyed. Simple!
In summary
There’s a lot here to pick up, but just take it a little at a time and compare constantly with the actual source code.
I’ll address the final aspect of the demo, the ground markers, in a follow-up shortly. They’re extremely simple in comparison, but show an easy way to use Behaviours to manage non-physics objects too.